I decided I wanted to try my hand at making a card that evokes happiness and good feelings. Orange is the color for the job!
I started with a piece of Bristol smooth cardstock cut to 4 1/4" x 5 1/2". I also pulled out my mini ink blending tools, sponges and the new Golden Sunset mini ink cubes from Altenew. I love the Altenew ink families when you want to make sure your colors all go together. I don't find myself using yellow and orange inks very often but these are SO pretty! I started with the lightest color, Sunray. I loaded up my blending sponge and started blended in a diagonal line across the cardstock. I then moved on to Chamomile, Snapdragon and finally Marigold. Now, this doesn't look so great...not yet anyways.
The trick is layers! I worked my way back and forth a few times in order to get vibrant and smooth colors. Once I was happy with the results, I squirted it lightly with water. I let it sit for 30 seconds or so and then blotted it up. I dried it with the heat gun. Next I gave it a quick spray with an iridescent shimmer spray. I dried this as well with the heat gun.
I'm so in love with this panel! On to the next steps. I treated the panel liberally with anti-static powder. Next I stamped the feather image from Altenew's Happy Dreams stamp set randomly on the panel with Versafine black ink. Then I sprinkled it with clear embossing powder and melted it with the heat gun. Next I grabbed the spots cluster from the same stamp set. I stamped it several times over the panel and melted the embossing powder. At this point I felt like I needed the spots to fill in more of the spaces but the feather were in the way. I could have gone ahead and created some masks to cover the feathers but I felt a bit lazy. I just tore some scrap pieces of paper and held them in place as I stamped the rest of the dots.
I went ahead and trimmed the panel down to 4" x 5 1/4". Now I needed a few more pieces for my card. I used a stitched circle die to cut out a 2 3/4" circle out of heavy vellum. I treated it with anti-static powder. I stamped the "Follow Your Dreams" sentiment, also from the Happy Dreams set, in VersaMark ink. I didn't want the wand that is included as part of the sentiment so I simply covered it with a small scrap before inking it up. Then I pulled it off the scrap before stamping down on the vellum. I sprinkled white embossing powder over it, tapped off the excess and melted it with the heating tool.
Next I cut a piece of black cardstock into a strip 1 1/2" x 4". Then I used the largest edge dies from the Lawn Fawn Lacy Borders die set to cut both long sides of the strip.
I then glued it about an inch from the left side of the yellow panel. I flipped the vellum circle over and used a glue pen to carefully apply the liquid glue behind the letters. This is my trick to keep the adhesive from showing through the vellum. Then I put it in place over the black strip.
I found that I hadn't been quite as careful as I thought and you could see some of the glue. To solve that I went around the left sides of the sentiment with an N3 gray Copic marker. This added a nice little shadow AND hid the glue. Problem solved!
I stamped one of the arrows onto white cardstock using the black VersaFine ink. I sprinkled clear embossing powder over it and melted it with the heat tool. I then used the matching Happy Dreams die set to cut out the arrow. I used a little liquid glue on the back and glued it down. I then glued the entire panel onto a black A2 sized card base. All done!
This card makes me happy so I guess it did the job!
I had so much fun making the first card I had to make a second one! This one is almost an exact opposite of the first card. Where I used black on the first card, I used white. Where I used white on the first card, I used black on the second. You get the idea.
Here it is!
Here they are side-by-side.
And close up so you can see the shadowing around the sentiment on the black card.
Which version is your favorite?
Thanks for stopping by!
~Kristina
Supplies used: (Affilate links below at no cost to you)
Zig 2-Way Glue Pen - Squeeze & Roll Shop at: Dies R Us |
 Neenah Solar White Shop at: SBC |
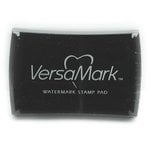 VersaMark Watermark ink pad Shop at: SBC |
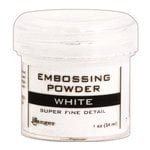 Ranger Super Fine White embossing powder Shop at: SBC |
 Tonic Studios-Retractable Craft Pick Shop at: SBC |
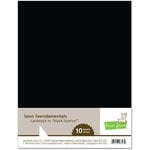 Lawn Fawn Black Licorice Cardstock Shop at: SBC |
 Mini Ink Blending Tool Shop at: SBC |
 VersaFine Onyx Black ink pad Shop at: SBC |
 Altenew Happy Dreams stamps Shop at: Altenew |
 Altenew Happy Dreams dies Shop at: Altenew |
 Ranger Clear embossing powder Shop at: SBC |
 Altenew Golden Sunset mink ink cubes Shop at: Altenew |
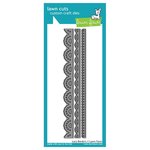 Lawn Fawn Lacy Borders dies Shop at: SBC |


Eeeek! The card makes me feel happy! You did a fabulous job and your colour choice rocks! The design is awesome as well.
ReplyDeleteThanks so much for entering your beautiful work in the AECP assignment Gallery. I love your write-up and descriptions! Please keep up with your excellent work!
I really like the white. The white and yellow/orange blend look really fresh
ReplyDelete