The class was called Beyond Basic Backgrounds. What a great class this was! I definitely enjoyed it and picked up all new tips along the way. In my card I actually use several of the techniques shown. The two I am focusing on are foiling a stamped image and water bleaching. Let's start with a picture of my completed card and then I'll take you through the creation process.
I started by cutting a piece of bristol smooth cardstock down to 4 1/2" x 5 3/4". I got out the 3 distress ink colors I planned to use along with the blending tool and sponges. The colors I chose were Black Soot, Evergreen Bough and Old Paper. I recently saw these colors used together on a YouTube video (Kristina Werner & Debby Hughes) and fell in love with the combination.
I started with the Black Soot and worked my way through Evergreen Bough to Old Paper. The bristol cardstock makes the blending quite a bit easier. I did still go back and forth several times to get the depth of color I was looking for and the smooth blend. Isn't it pretty?
I gave it a bit of a blast with my heat tool and set the panel aside to dry. While I was waiting, I cut an A2 sized card base out of Neenah 110lb solar white cardstock. I did make it a top fold. I took a long strip of 1/4" double sided sticky tape and placed it along the left side of the card. Next I peeled off the backing paper and laid a piece of silver Deco Foil on top. I grabbed my teflon bone folder and went over the foil a few times with firm pressure. I peeled it away to reveal my super shiny silver strip!
Now back to the card panel. This is where the foiling a stamped image technique comes into play. I went over the entire panel with an anti-static powder. Then I picked one of the stamps from Altenew's Beautiful Peony stamp set. This is one of their recent releases that I just had to have! I inked it up with Versamark ink and stamped it several times randomly on the panel.
Next I sprinkled clear embossing powder over all of the stamped images. I tapped it several times and grabbed a brush to pick up the stray bits of powder. Then I turned on my heat tool to let it warm up a bit. The Beyond Basic Backgrounds class shows you how to melt the embossing powder and then immediately put the foil on top and burnish it in place. It is what I attempted to do but I ran into a few snags. My embossing powder would not stay melted long enough to grab the foil. I think that was due to two specific things. The stamp image is a very fine line. I think that was why it hardened immediately. Also, the instructor suggested that bonding powder works better for this technique. I couldn't find my jar so I just used regular embossing powder. So, now what?
I was not about to give up on this card. I decided to get out my Minc machine. I put the card panel and foil into the Minc carrier sheet. Once it was all warmed up, I ran it through. It worked! Now, it did change the thickness of the stamped image lines but I was totally ok with it. I also noticed that I must not have gotten all of the stray embossing powder off. There were lots of random silver flecks on the card panel. Again, I'm okay with it. I think it looks like I meant to do it! Happy accidents are the best!
Time to break out the second technique I picked out from the Beyond Basic Backgrounds class. The instructor showed stamping your images with water onto a distress ink background. I didn't do that exactly but it is still bleaching with water. I took a brush with clean water and went over the insides of all the foiled flower images. I let it sit for a bit and blotted it up. I repeated the process a few times. Once it was as light as I could make it, I went over it one more time with Wink of Stella Glitter gloss. I love the gorgeous shimmer it adds.
As that was drying, I got out the dies I planned to use on the card. I used 3 letters from the Calligraphy Alpha die set. I grabbed a ruler to help get them in a straight line.
Then I put a piece of low tack tape over them and ran them through my die cut machine. This is when I cut my panel down to 4" x 5 1/2". I went ahead and glued the panel onto the card base. I also added in the little letter bits from the y and the o.
I set the card aside for the moment. I cut the letters out 3 more times from black cardstock. I glued all of the layers together using Zig 2-way glue. The top layer was the letters cut out from the distress panel. I then glued the letters in place. Why did I use black cardstock? I think it helps the die cut letters pop out just a bit more from the background.
We are almost done! I treated a piece of black cardstock with anti-static powder. I then stamped hello from the Altenew Faux Veneer set with Versamark ink. I sprinkled white embossing powder on top. I made sure all of the stray white bits of powder were removed. I melted it with my heat tool. I carefully trimmed it down and glued it right above the you. Card complete!
Here is a close up so you can see what I mean about the black cardstock.
And one more photo.
I appreciate you stopping by today. Keep on crafting!
See you soon!
~Kristina
Supplies used:
 Tombow Mono Multi Liquid glue Shop at: SBC |
 Deco Foil - silver Shop at: SBC |
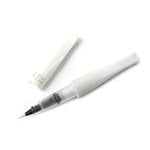 Wink of Stella - Glitter Clear Shop at: SBC |
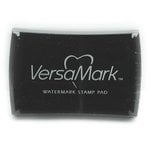 VersaMark Watermark ink pad Shop at: SBC |
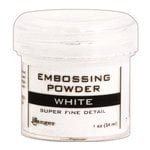 Ranger Super Fine White embossing powder Shop at: SBC |
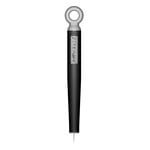 Tonic Studios-Retractable Craft Pick Shop at: SBC |
 Lawn Fawn Black Licorice Cardstock Shop at: SBC |
 Distress Ink pad Black Soot Shop at: SBC |
 Distress Ink pad Evergreen Bough Shop at: SBC |
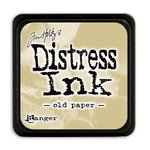 Distress Ink pad Old Paper Shop at: SBC |
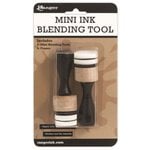 Mini Ink Blending Tool Shop at: SBC |
 Heidi Swapp MINC 6 inch Mini Foil Applicator Shop at: SBC |
 Altenew Faux Veneer stamp set Shop at: Altenew |
 Altenew Calligraphy Alpha Die set Shop at: Altenew |
 Altenew Beautiful Peony Shop at: Altenew |
 1/4 inch double sided tape Shop at: SBC |
 Stick It Adhesive sheets Shop at: SBC |
 Zig 2-way glue pen Shop at: SBC |


This is such a stunning card!! Love the inking and colours too.
ReplyDeleteI am so glad that you entered your beautiful work in the AECP assignment Gallery. Awesome details and design! Super work!