Sunday, September 29, 2019

Let's get our Halloween on!

Hi crafty friends!  Polka Dot Orchard has joined in with several other companies to hop along in honor of National Coffee Day. This fun event is being hosted by the Coffee Loving Paper Crafters Group. Not only are we hopping along with lots of great companies, we are also doing a hop with our awesome design team showcasing the new releases! Polka Dot Orchard is doing a few giveaways too. Head over to the Polka Dot Orchard blog HERE for more info on the giveaways and the complete line up for both hops!

I'm SO happy to have you stop by.  I'm taking a small break from fall and florals to dive into some Halloween goodness!  Polka Dot Orchard has added over a DOZEN new digital stamp sets to their Etsy store.  Halloween, Fall, coffee and winter.  You really  *need* to go check it out HERE.  I'll be showcasing two different stamp sets today, Cats and Magical Hats and Autumn is Calling.

Here's my first card and it was created using Cats and Magical hats.


I had planned on coloring the entire scene with Copic markers and then I got to thinking.  Why couldn't I do the night sky with Distress Oxide inks?  I kept thinking how lovely it would look without using a ton of my Copic marker ink.  Now I needed a mask.  Yep, you can totally create masks for digital stamps!  I simply printed the image out on copy paper.  I carefully cut it out right on the line and then applied a thin coat of Tombow Mono Mulit liquid glue to the back.  Once this glue dries, it makes your paper sticky enough to be a mask and still easy to remove.  I love this stuff.

I printed the image I wanted to color with Copics onto a piece of X-Press It cardstock.  I applied my mask and picked out the Distress Oxide colors for my night sky.  I chose Peacock Feathers, Faded Jeans and Black Soot.  I used some blending brushes to add on the color.  This was a time where it took me a little bit longer to get a seemless blend because I picked a cardstock that was Copic friendly.  Once I was happy with the blending, I peeled off my mask.  I had a tiny bit of adhesive here and there but I just used an adhesive eraser.  I did splatter on clean water and then blotted it up with a paper towel.

Before I removed the mask

After I removed the mask

I decided I should color the darker items first, the cat and the hat.  That way if there was any color bleeding I could fix it before coloring the lighter items.  I colored the cat using W0, W3, W5, W7, W9 and R20.  I colored the purple hat with BV17, V12, V15, V17.  The black band used T5, T7 and T9.  For the moon I used Y000, Y00 E43, E40.  For the broom I used YR20, YR 21, YR24 and YR24 for the fibers and E71, E74 and E77 for the handle.

I went over the entire moon with Spectrum Noir Cyrstal Clear sparkle marker.  Once it was dry, I added Stardust Stickles to the craters I had created on the moon.  Now we are getting near the end!  I cut the panel out with a scalloped rectangle die and mounted it onto a pale yellow/cream card base.  Next I cut out the "Flying by..." sentiment which is from the same stamp set.  I cut banner ends and went arount the edge of the paper with a purple Copic to help tie it together.  Then I added foam tape to the back of the sentiment, adhered it to the card front and this card was done!

Let's talk about card number two!  And yes, it's a fall card.  I couldn't help myself!!


For this card I started by printing all of my images out onto Bristol Smooth cardstock.  I wanted to use my Zig Clean Color real brush markers and I find that Bristol works the best for me.  The owl, tree, leaves and mushrooms were all colored with Zig markers.  Somewhere in the middle of coloring things I lost track of which colors I used where but here is a list of all the colors I used.

Deep Brown 68
Mid Brown 65
Brown 60
Oatmeal 64
Beige 72
Deep Red 260
Orange 70
Deep Violet 84
Olive Green 43

Once I was done with the coloring and they were all dry, I fussy cut them out.  Now I needed a background that was colorful but not so colorful that the images got lost.  I grabbed another piece of Bristol cardstock and started applying Distress Oxides inks to make an autumn sky.  I started at the bottom with Mowed Lawn, Peeled Paint, Mustard Seed, Spiced Marmalade and ended with Seedless Preserves.  I went back and forth several time until I got a smooth blend.  Then I splattered on some water mixed with Perfect Pearls.  I dabbed up the water and gave it time to dry.

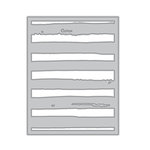
Now I wanted something to put between my background and the images.  I remembered I had this awesome Watercolor Stripes cover die from Altenew that I have been wanting to use, so out it came!  I cut out a piece of natural ivory cardstock.  I added some liquid glue and adhered it to the ink blended background.  Then I glued that panel to a card base made out of the same paper as the die was cut from.

Time for the fun part!  I played around with all of my pieces until I loved the layout.  I started by gluing the tree trunk in place.  Next I added the red and the orange mushroom.  Those two mushrooms were glued on with liquid glue.  For the purple mushroom I added foam tape.

Next I put foam tape on the back of the owl and added it to the tree stump.  I made sure to leave some space behind the owl to attach my leaves.  These were all attached with liquid glue.  Now all that was left was to add the sentiment.  I printed the sentiment out on to Bristol as well but didn't want it to be stark white.  I took the Seedless Preserves and Spiced Marmalade oxide inks and blended the color onto the strip.  I added foam tape to the back of the strip and popped it on my card.

I really love the fall look of this card!

Here they both are:


Thanks for visiting today!
~Kristina

Supplies used:

Tombow Mono Multi Liquid glue
Shop at:
SBC | EH
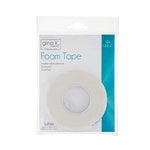
Therm O Web Foam Tape
Shop at:
SBC | EH
Distress Oxide-Faded Jeans
Shop at:
SBC | EH
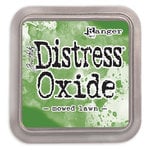
Distress Oxide - Mowed Lawn
Shop at:
SBC
Spiced Marmalade Distress Oxide
Shop at:
SBC | EH
Strathmore Bristol Smooth paper
Shop at:
EH
Seedless Preserves Distress Oxide
Shop at:
SBC | EH
Ranger Tim Holtz Water Brush - Fine Brush
Shop at:
EH
Peacock Feathers - Distress Oxide
Shop at:
SBC | EH
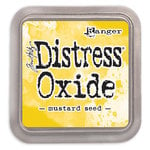
Mustard Seed - Distress Oxide
Shop at:
SBC | EH
Peeled Paint - Distress Oxide
Shop at:
SBC | EH
Spectrum Noir Sparkle Marker - Crystal Clear
Shop at:
EH
Watercolor Stripes cover die - Altenew
Shop at:
SBC | EH

Wednesday, September 18, 2019

Beauty in blue

I hope my floral lovers are here today because I've got a beauty to show you!  Today I am using an image from Polka Dot Orchard.  It is from the Flowers in Bloom set.


I do love me some florals!  Here is my card:


I began by printing the stamp out onto watercolor paper in more of a medium gray instead of black.  Then I started adding color with watercolor pencils.  I used a waterbrush to blend the pencil and spread out the color.  I went back a couple times to add more shadows in the darker areas.

After I was done with the coloring, I ran it through my Minc machine with silver foil.  Since the outline print image was so light, it only picked up some of the silver foil.  I love the look!  

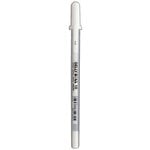
I added white dots with a gel pen to the edge of some of the petals as well as the center of the flower.  I cut the watercolor panel down and added a layer of gray patterned paper behind it.  

For the card base I cut a piece of dark gray cardstock down to be a top fold, A2 sized base.  I cut a rectangle of blue patterned paper on the diagonal and glued a piece to two of the corners.  I added foam tape to the back of the watercolor & gray panel and glued it in place.

The sentiment comes from the It's Your Day set.  I printed it on white cardstock and ran it through my Minc with a teal colored foil.  It looks awesome in real life!  I cut a banner edge and then cut a gray piece of cardstock to match.  I added foam tape to the back and added it to the card.  For the final details I added Silver Moondust Nuvo drops.  There you have it.  A simple but lovely card!


Thanks for stopping by!
~Kristina


Thursday, September 12, 2019

In my thoughts

Is it Friday yet?  Have you ever noticed how long the first full week after a holiday feels?  LOL!  I'm struggling but I've almost made it to the weekend.  Go me!  Anywho...let's talk about a card!  I have been wanting to increase my stash of sympathy cards because I never seem to have any on hand when I need them.  I tend to use flowers as my go to images and the Spread Your Wings set from Polka Dot Orchard is just perfect!


Here is the card I created.


I started by printing the flowers out onto a piece of watercolor cardstock.  Then I used several different shades of watercolor pencisl and blender brush to color up the image.  I cut it out with a scalloped rectangle die

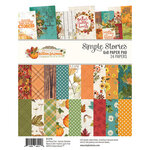
I added foam tape and adhered it to an olive green rectangle.  This was then glued directly to a gorgeous floral design paper from Simple Stories.  Then finally onto a natural ivory card base.

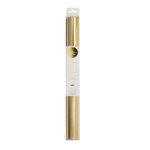
The sentiment comes from the Floral Flourish Background 4 set.  I printed it onto a rust piece of cardstock.  Then I ran it through my Minc with gold foil.  I added foam tape to the back of the strip before adding it to the card.  Now I needed some more sparkle so I added gold splatters over the entire card front.  Ta da!  All done!

I hope you will head over to the Polka Dot Orchard store HERE and check out all of the awesome stamp sets!


Smooches
~Kristina

Other supplies used:


Tombow Mono Multi Liquid glue
Shop at:
SBC | EH
Heidi Swapp MINC 6 inch Mini Foil Applicator
Shop at:
SBC
Therm O Web Foam Tape
Shop at:
SBC | EH
White Gelly Roll pen
Shop at:
SBC
Canson Watercolor paper
Shop at:
EH
Ranger Tim Holtz Water Brush - Fine Brush
Shop at:
EH
Autumn Splendor - Simple Stories
Shop at:
Dies R Us
Gold Foil - Heidi Swapp
Shop at:
SBC

Tuesday, September 10, 2019

Meow!

Happy Wednesday!  I'm over on the Dies R Us blog today sharing my very last post as part of the design team.  Here is the first card I created.


Now click right HERE to go to the Dies R Us blog to check out the second card I made and all of the details!

Hope to see you there!
~Kristina

Tuesday, September 3, 2019

Flippin Fall fun

Hey there crafty friends!  After a bit of crafting drought, I'm back!  Today you will find me over on the Dies R Us blog trying out the fabulous Triple Flip die from Karen Burniston.

All you gotta do is click HERE!

Here is the front side of the card.  You'll have to head to the blog to see the back side!


Hope to see you there!

Monday, September 2, 2019

Stay Beautiful

It's a long holiday weekend so that means I had the opportunity to work on my next Altenew Educator Certification program project!  This class was called Polychromatic.  As you can imagine, this class focused on ways to use multiple colors on your projects.    The instructor is the fabulous Nina-Marie Trapani!

My favorite lesson was the one that did watercoloring with similar colors.  Plus, I recently got my hands on some black watercolor paper and I was itching to try it out!


Let me walk you through my process.

I chose to use the lovely Leaf Clusters set.  My watercolors are Finetec Mica watercolors.  These show up so well on the black watercolor paper.  I added small amounts of water to the paint pans.  Then I used a damp paint brush to pick up the color.  I dabbed the paint gently onto the stamp.  I stamped it onto the watercolor paper and held it in place for a bit.  This was so that the paints could absorb into the paper.

Once the images were dry, I cut them out using the matching dies.  Now that I could see the stamp outline clearly, I went back with some lighter, similar colors to add a bit of detail.


I cut another piece of the black watercolor paper and got to work on a background.  I used three of the same colors I had used on the stamps to create a wash background.  I then cut it out with a scalloped rectangle die.


I cut a scalloped white oval as a centerpiece for my card.  I played around with the layout until I was happy with it!


I adhered the watercolor wash panel onto a top fold, A2 white card base.  I added foam tape to the back of the white oval and glued it in place.  Then I used liquid glue to add the flowers.  I did trim off the leaves that hung over the edge of the card.

Now to add the final touches!  I stamped the sentiment using Stay Beautiful from Geometric Flowers and Friend from Frosted Garden.  I then glued the sentiment rectangle onto a piece of vellum just slightly larger.  I also added foam tape to the back of it before adhering it on top of the flowers.  And last, but not least, I added a sprinkling of sparkling clear sequins.


I hope you have enjoyed my project today!

~Kristina

Supplies used:


Geometric Flowers - Altenew
Shop at:
Altenew
Tombow Mono Multi Liquid glue
Shop at:
SBC | EH
Therm O Web Foam Tape
Shop at:
SBC | EH
Frosted Garden - Altenew
Shop at:
Altenew
Leaf Clusters Stamps - Altenew
Shop at:
Altenew
Leaf Clusters Dies - Altenew
Shop at:
Altenew
4mm Sparkling Clear sequins
Shop at:
EH
6mm Sparkling clear sequins
Shop at:
EH