Wednesday, April 22, 2020

PDO Celebrate Today

Well hello there my crafty friends.  I welcome you back to my little crafting corner of the world.  I have a new slimline card to share with you and it showcases the fabulous Celebrate Today set from Polka Dot Orchard.

Purchase HERE

For my card today I wanted to focus on the fact that you can make a card using a minimum of coloring.  Let's face it, I don't want to spend hours coloring every image for every card I make!  I love to color but, well, I have a life and work and family.  You get the idea.  So I challenged myself to keep it simple.


I printed the cake digital stamp set out on to Neenah 80lb Solar White cardstock.  Before I decided on what colors I wanted to use, I went digging through my stash of patterned paper.  I wanted something bright and cheery.  I came across this super fun piece with abstract dots and circles.  This was the right one for my card!  I got out my handy dandy Copic color chart and started looking for a good match.  Here is my list:

Pinks: RV52 & 55
Yellows: Y13 & 15
Green: YG25

Pretty short list huh?  I picked the elements I wanted to color and got busy.  It didn't take more than maybe 15 minutes to add those to the cake.  


Since I was keeping the coloring simple, I wanted to make the cake pop a bit more from the white paper.  I got my N Copic Markers out and went around the entire image.  I started with N3 and worked my way out to 0.

While I waited for the Copic marker dry I got out some of my favorite slimline dies from Trinity Stamps.  The set I used today is the Slimline Stitched Card Panels and Windows.  I used the two largest stitched rectangles. The largest to cut out the patterned paper and the medium to cut out the cake image.  I glued these two layers together with Tombow Mono Multi liquid glue.  I created my slimline card base by cutting a piece of pink cardstock to 7 3/4" x 8 3/4 inches and folding it in half.  I used the same liquid glue to adhere the card panels to the pink card base.

Now I needed a sentiment.  I had printed all of the sentiments out onto a scrap piece of copy paper.  I find this lets me play around to see how my sentiment is going to fit best.  In this case I decided to use 'It's your day" but I wanted each word to be separate.  I went ahead and printed it out onto Neenah cardstock.  Then I picked another color to match from the patterned paper.  I chose a light blue.  The B12 Copic is almost a perfect match!  I colored over my sentiment before I cut it into three pieces.

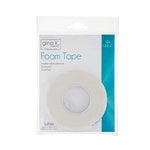
While I waited for the sentiment to dry, I got to adding a bit more detail to the card .  I recently purchased Unicorn Stickles and thought these would look great on this card.  And they do!  I only added it to some of the colored areas and a few of the uncolored areas.  I added foam tape behind the sentiment pieces and adhered them onto the card. Card complete!

Here's a close up of the Unicorn Stickles.


Love me some sparkle!  As always, I truly appreciate you taking the time to stop by.

Until next time...
~Kristina


Supplies  

Compensated affilate links may be used - I may receive a small commission at no additional charge to you should you make a purchase using my link.


Copic Marker RV55
Copic Marker RV55
Shop at:
EH
Copic Marker YG23
Copic Marker YG23
Shop at:
EH
Copic Marker YG25
Copic Marker YG25
Shop at:
EH
Copic Marker N0
Copic Marker N0
Shop at:
EH
Neenah Solar White
Neenah Solar White
Shop at:
SBC | EH
Tombow Mono Multi Liquid glue
Shop at:
SBC | EH
Copic Marker Y13
Copic Marker Y13
Shop at:
EH
Copic Marker B12
Copic Marker B12
Shop at:
EH
Copic Marker RV52
Copic Marker RV52
Shop at:
EH
Therm O Web Foam Tape
Shop at:
SBC | EH
Copic Marker N1
Copic Marker N1
Shop at:
EH
Copic Marker N3
Copic Marker N3
Shop at:
EH
Copic Marker Colorless Blender
Shop at:
EH
Copic Marker Y15
Copic Marker Y15
Shop at:
EH
Unicorn Stickles
Unicorn Stickles
Shop at:
SBC | EH
Stitched Frames & Squares - Trinity Stamps
Shop at:
EH

Friday, April 17, 2020

#spreadjoynotgerms Blog Hop


Hello fellow crafters!  I'm super excited to welcome you to my blog for the #spreadjoynotgerms Blog Hop!!  So many wonderful crafters have come together to spread a little joy.  A huge thanks goes out to Catherine Pooler and  Alexandra at The Hedgehog Hollow for putting this all together.

I am proud to be one of the Design Team members for Polka Dot Orchard participating in the hop.  You can see links to all of the other PDO DT members participating right HERE on the Polka Dot Orchard blog.  Please check out all of the fantastic products available over in the Polka Dot Orchard store HERE.

The stamp set I'm using today is called Anything is Possible and can be purchased HERE.


I stepped outside my usual comfort zone and used both Copic markers and watercolors on my card.  Let's take a look.


Isn't she gorgeous??  I fell in love when I first saw the set.  Let's talk details.

I printed two of the floral corners out onto a square piece of watercolor paper.  I got out my Daniel Smith watercolor palette that hasn't seen much love.  I copied one of the early palettes Sandy Allnock created and shared with us.  My watercolor brush of choice is the Silver Black Velvet 6 round brush.  The colors I used are Green Apatite, Quinacridone Coral, Quinacridone Gold, Carbazole Violet, New Gamboge and Ultramarine Turquoise.  I forgot just how beautiful these colors are!  Once it was dry, I did go back and add a little bit of shading and other details.


Now onto the girl.  I printed her out onto a piece of 80lb Neenah Solar White cardstock.  I did quite a bit of research to find a darker skintone that I liked.  Here is a list of all Copic markers I used on her.

Skin: E34, E23, E25, E27 and V17
Lips: E07 and E04
Eyes: YG95 and W9
Hair: W5, W7, W9, 100 and E27
Dress: Y21, YR21 and YR23


I love that she has a spray of matching flowers in her hair.  I really wanted the colors to match with the background flowers.  Instead of searching through Copic markers to match, I used the same Daniel Smith watercolors.  The secret is to use as little water as possible.  Neenah cardstock isn't made for watercoloring but it can handle some moisture.  I carefully cut her out and went around all of the edges with a black marker to give it a finished look.

The sentiment also comes from the same set.  I printed it out on the same 80lb Neenah cardstock.  I created cut lines around the sentiment with a pencil.  This helped me get a nice, even border around it.  I cut it out by hand.  The white looked too stark so I colored the cardstock with a BV11 Copic marker.  I went around the edges with the BV17 marker.

Let's make a card!  I created a 5 1/2" square card base out of black cardstock.  I cut the watercolor paper down to 5 1/4" square and applied it with a generous amount of sticky tape.  I applied foam tape to the back of the girl and adhered her to the watercolor paper.  For the sentiment, I used liquid glue on the part on top of the girl and foam tape on the part that hung over.  This keeps it nice and level.


For my finishing touches I added white dots on her pupils and Midas Touch Nuvo Aqua Shimmer pen to her lips.  She is all done!

Thank you oh so much for stopping by today.  *Your next stop is at Nicole Watt's blog HERE*

If you get lost along the way you can head to Catherine Pooler's blog HERE or the Hedgehog Hollow blog HERE for all the links, details and complete list of prizes.

Look at this huge list of amazing sponsors for the hop!


Polka Dot Orchard is giving away a $20 gift certificate to the PDO store.  A reminder that you can find the complete list of prizes HERE and HERE.

And if you'd like a chance to win a prize, leave a comment answering this question:  What are your favorite coloring mediums to work with?  You do not have to comment on all of the blog posts but the more you do the more chances you have to win!  Prizes will be randomly drawn from all the blogs and all the comments To be eligible for a prize, leave a comment before the deadline of April 24th.  Winners will be announced April 27th on Catherine and Alexandra's blogs.

I hope you are having a lot of fun hopping along!  Remember that your next stop is Nicole!


~Kristina


Friday, April 3, 2020

PDO - Purr-fectly Lovely

Welcome to April and welcome back to my blog!  One of new stamp sets released by Polka Dot Orchard is called Purr-fectly Lovely Easter.  I knew the moment I saw it that this set was meant for me.  I'm a big cat lover and have five fur babies (in addition to my two human children) to share my crafting space with.  It can sure be challenging to craft with pets around.  Take a peek at the picture of the set below and head HERE to grab it from the PDO store.


I also used the background from the Woodland Cuties (Easter Moose) set.


You can snag it in the store HERE.

Alrighty, lets check out my card.   I just HAD to do another slimline card.  I really am hooked.


I don't know about you guys but my creativity has taken a bit of a vacation.  This card was a whole lot of playing until I just found something that made me happy.  Shall we talk about my process?

I started by printing the kitty image out onto Neenah Solar White cardstock.  I decided I wanted to color the kitty to match my cat Percy who is a Russian Blue.  I felt the N Copic grays were the best match for the fur.

Copics used: N7,5,3,1. G17. R30 & 32. E50, 51, 53, 55, 57 & 59.  I then cut it out but I left a small white border around it.  I was thinking ahead to my background and I thought it would help the kitty pop from the background.


I printed the egg background onto a piece of white cardstock that I cut down to 8 1/2" x 3 1/2".  I dug out my Distress Inks and pulled out six bright colors.  Those are: Squeezed Lemonade, Carved Pumpkin, Picked Raspberry, Wilted Violet, Peacock Feathers and Mowed Lawn.  I got out my foam blending tools and started applying the Distress Inks.  Once the blending was complete I splattered on some clean water, let it sit and then dabbed it up.  I always love this look.  I also sprayed the entire piece with Sparkle Sheer Shimmer Craft Spray.  This spray is AMAZING!  It's just so sparkly.  It's really hard to capture in photos but its stunning in real life.


I set the background aside to dry and got to work on a few more pieces I needed.  I cut a piece of green cardstock with the grass die from Trinity Stamp's Slimline Scenic Borders set.  I sponged on the Mowed Lawn Distress ink and also spritzed with clear water.  Now I wanted some clouds.  I didn't want to cover up  too much of the background so I used a heavy vellum.  I cut it with the cloud die from the same Trinity Stamps Slimline Scenic Borders die set.  I almost have all the pieces.

Next, I cut out some extra eggs from another piece of the background that I had printed.  I cut out five of them and sponged a different Distress Ink from the background on each egg.  Wanna build a card?

I glued the grass piece down at the base of the background panel.  I wrapped the vellum clouds around the top of the background panel and glued them on the backside.  I added the kitty on top of the grass and arranged the eggs around his feet.  I printed one of the sentiments from the Purr-fectly Lovely Easter Kitty set onto white cardstock.  I trimmed it down and backed it with a piece of black cardstock just leaving a small border.  Before I glued it over the vellum clouds, I added a dab of glue under the vellum.  The sentiment is going to cover it perfectly.

I let the card sit overnight.  I wanted to do something else to add a bit more but I wasn't sure what it was.  I looked through some of my newish craft supplies and grabbed out the Unicorn Stickles.  I went through my other Stickles and found Icicle Stickles.  These match the Unicorn Stickles but it has bigger "chunks" of glitter.  I added both onto different parts of the eggs on the background and by the kitty.  It was just what I was looking for!


I love how this slimline card turned out.  It just makes me happy!  Thanks SO much for stopping by today.

~Kristina