Wednesday, May 27, 2020

Coffee Lovers Blog hop - Card 2

Hi there!  Thanks for stopping by to check out my latest card for the Coffee Lovers Blog hop!  You can link up, hop along and find all the details HERE.


I am using images from two different Polka Dot Orchard digital stamp sets, She Said Tea and He Said Coffee.


Since Polka Dot Orchard is a Super Sponsor, they are also offering a 30% discount on all coffee themed items!  Including their laser engraved coasters!  Just use code coffee2020.

Let's check out my card shall we?


Vintage isn't my normal style but these images just spoke to me and seemed like the perfect fit!  I also couldn't resist making another slimline card.

I changed the color of the images to be a dark brown, sized them down and printed them out onto Neenah Solar White cardstock.  I used the smallest die from Trinity Stamps Scalloped Card Panels set to cut out the image layer.  I mounted it onto a piece of dark brown cardstock just slightly larger than the white piece.  

I also changed the color of the sentiment (from She Said Tea) and printed it onto Neenah cardstock.  I took a scrap piece of the white cardstock and colored it using the Trinity blending brush and Walnut Stain Distress Oxide ink.  I cut the white piece down with my cutter and glued it to the Walnut Stain piece.  I put a bit of foam tape on the back and adhered it to the card.

I set that panel aside and got to work on the rest.  I used a digital paper from Graciellie Design and printed it out onto Neenah cardstock.  I cut it down to 8 3/4" x 3 1/2".  I grabbed the Trinity blending brush and Walnut Stain ink pad and went around all of the edges.  I found some natural colored twine in my stash I wanted to use but it was a little too bright for my taste.  I just used the blending brush and the Walnut Stain ink and ran it over the twine.  I only wanted to make it look a bit distressed so I didn't add tons of color.  I wrapped it around the coffee paper three times and used tape on the back to hold it in place.

I created a dark brown card base that measuere 8 3/4" x 3 3/4" when folded.  I added foam tape to the back of the coffee paper before adding it to the brown base.  I also added foam tape to the white panel before adding it to the card.

I felt the white panel was too "clean" so I splattered on some of the Walnut Stain Distress Ink.  I just smooshed some onto and acrylic block, added water and grabbed a paint brush.  To finish up the card I added a few drops of Dark Walnut Nuvo Crystal drops.


Thanks for stopping at my little crafty corner of the web!
~Kristina


Supplies used:
Compensated affilate links may be used - I may receive a small commission at no additional charge to you should you make a purchase using my link.

Neenah Solar White
Neenah Solar White
Shop at:
SBC | EH
Tombow Mono Multi Liquid glue
Shop at:
SBC | EH
Trinity blending brushes
Shop at:
EH | T
8.5 inch Tonic Guillotine Cutter
Shop at:
EH
Slimline Scalloped Card Panels die - Trinity Stamps
Shop at:
EH | T
Walnut Stain Distress Oxide ink pad
Shop at:
SBC | EH
Dark Walnut Nuvo Crystal drops
Shop at:
SBC | EH

Saturday, May 23, 2020

Coffee Lovers Blog hop - card 1

Hello there friends!  Today I'm sharing my first card that I created for the Spring/Summer Coffee Lovers Blog hop.


You can find all of the details on how to play along and link up HERE.

My card uses I Like You a Latte from Polka Dot Orchard and can be purchased HERE.


I thought this would make a really cute shaped card so that's what I did!  


I sized it to be a little bit smaller than an A2 sized card and printed it out on Copic friendly cardstock.  Then I traced around it, leaving a bit of a border.   I folded my cardstock in half and cut on the pencil lines giving me a shaped card base.

I colored the main coffee cup using Copic markers.  

Purples: V09, 17, 15, 12
Pink: RV32, 32
Grays: C3, 1, 0, 00, W3, 1, 0, 00
 
I carefully cut it out along the lines.  Then I went around the edges with a black marker.  Before I adhered it to the shaped base, I colored the edges of the base with the lightest purple Copic.  


To complete the card I printed out the sentiment with some of the coffee beans.  I colored in the beans with the same purple Copics and left the sentiment uncolored.


Thanks for stopping by!
~Kristina


Sunday, May 17, 2020

Slimline Floral

Happy Sunday fellow crafters!  I thought I would pop on real quick and share my latest card creation.  I found a new to me digital artist, Ann Corbiere-Scott.  She just went live with a website that has some super fantastic floral images to print.  My card uses the "Lucinda" print and can be found HERE.

Here it is!


I'm so in love!  I'm also really loving the Karin Markers I recently purchased. 

I printed the image out onto watercolor paper.  I then used Karin Markers and a waterbrush to color the image.  The colors I used are Turquoise 654, Royal Blue 45, Arctic Blue 264, Sapphire Blue 189, Grass 253, Lush Green 228, Amber 195, Sandstone 174 and Skin 1 200. 

I trimmed the completed panel down to 3" x 8".  I then adhered it to a dark grey cardstock, leaving just a slight border.  I cut a piece of light coral cardstock with the largest scalloped die from the Trinity Stamps Slimline Scalloped die set.  I adhered all layers onto a dark gray card base that measures 8 3/4" x 3 3/4".

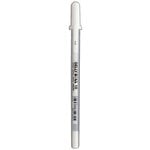
To create more interest on the panel, I added white dots with a gelly roll pen and sparkle dots with the Stardust gelly roll pen.  In the very center of the flowers I added a drop of Gold Luxe Nuvo Dream drops.  

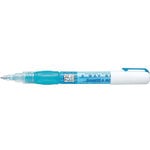
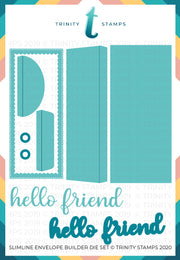
While the panel was drying, I cut the hello sentiment out of black cardstock using Trinity Stamps Slimline Envelope builder die.  I cut the hello out two more times and used a Zig 2-way glue pen to adhere all the layers together.  I went over the top layer with a Nuvo Aqua Shimmer pen.  I used liquid glue to adhere the sentiment to the panel.


I encourage you to check out Ann's other images on her website.  Click HERE.

Enjoy the rest of your day!
~Kristina

Supplies used:
Compensated affilate links may be used - I may receive a small commission at no additional charge to you should you make a purchase using my link.


Tombow Mono Multi Liquid glue
Shop at:
SBC | EH
Tonic Studios-Retractable Craft Pick
Shop at:
SBC | EH
Zig 2-way glue pen
Zig 2-way glue pen
Shop at:
SBC | EH
White Gelly Roll pen
Shop at:
SBC
Canson Watercolor paper
Shop at:
EH
Ranger Tim Holtz Water Brush - Fine Brush
Shop at:
EH
8.5 inch Tonic Guillotine Cutter
Shop at:
EH
Slimline Envelope Builder die - Trinity Stamps
Shop at:
T
Slimline Scalloped Card Panels die - Trinity Stamps
Shop at:
EH | T
Gold Luxe, Nuvo Dream drops
Shop at:
SBC | EH
Stardust Glitter pen, Sakura Gelly Roll
Shop at:
SBC | EH

Thursday, May 7, 2020

Mother's Day

Hello there!  I'm happy to welcome you to my blog today.  Today's post is going to be short but sweet.  Sometimes I'm a procrastinator when it comes to making a card.  Let's say Mother's Day is coming up.  You keep meaning to sit down and make that card and well, you just don't.  Thankfully Polka Dot Orchard has come to the rescue with a super fabulous digital stamps set for Mother's Day.  The best thing is you can order it and get instant delivery since it is a digital stamp!  That's what I call instant gratification.  To make it even better, it's on SALE right now!  The set is called A Mother's Love.

Purchase HERE

Isn't it lovely!  So, like I said, I was in a bit of a hurry to get a card made.  This set is so beautiful on it's own that you really can make a card lickety split!  Let's look at the card and then I'll fill in some details.


I layered the image and the sentiment together in my editing program.  I lightened the mother image so that the sentiment would be more prominent.  I then printed it out onto watercolor paper.  Next I got out my lovely set of Prima Vintage Pastels watercolors and my Silver Black Velvet size 6 round brush.  I carefully went around the outside of the entire image with clean water. Then I came back and started dropping in the color called Breezy.  I deepened the shadows in a few places and called it done.  That's it.  That is all the coloring I'm doing for this image.  

Once it was dry, I cut it down to 4 1/2" x 6 1/2".  I wanted this to end up being a 5" x 7" card.  I cut a frame slightly larger out of a dark pink cardstock.  Then a floral piece of paper cut at 5" x 7".  I adhered all of the pieces to a Neenah Solar White card base using liquid glue.  I went over the word "mom" with a Spectrum Noir sparkle pen.  For a final bit of decoration, I added a few drops of Cloud 9 Nuve Dream drops.  A new favorite of mine!

I love when a stamp image is just so pretty that you don't have to do alot to end up with a gorgeous card.  Like I said, this was super quick to put together and I think it looks fabulous!  No one even has to know I made it last minute...


Thanks so much for stopping by!
~Kristina    


Supplies used:
Compensated affilate links may be used - I may receive a small commission at no additional charge to you should you make a purchase using my link.


Silver Black Velvet brush, 6 Round
Shop at:
EH
Neenah Solar White
Neenah Solar White
Shop at:
SBC | EH
Tombow Mono Multi Liquid glue
Shop at:
SBC | EH
Spectrum Noir Sparkle Marker - Crystal Clear
Shop at:
EH
Cloud 9, Nuvo Dream Drops
Shop at:
SBC | EH
8.5 inch Tonic Guillotine Cutter
Shop at:
EH
Prima Vintage Pastels Watercolors
Shop at:
SBC