Purchase HERE
I have a co-worker who is expecting a baby girl any day now and I wanted to have a card all ready to go. I was making a few sketches and I was struck with the idea to use the giraffe. I mean, giraffes are totally perfect for baby cards.
I just adore how this turned out! I love it when a plan in my brain actually works out on paper. Let's talk details.
I cut a piece of watercolor paper to 8 3/4" x 3 3/4". I picked out two Distress Oxide inks to use with Trinity Stamp's Slimline Stripes stencil. I'm using the diagonal one today. I sprayed the stencil with Pixie Spray and got to work. I used Spun Sugar for the first layer. Now, I wanted to use the stencil in the opposite direction to create a gingham look. The stencil isn't big enough for that but don't let that stop you. I just moved it to where I needed it and lined it up. I made sure not to leave any harsh edge lines when I used Picked Raspberry for the next layer. I also spritzed it with clean water and dabbed it up. Plus, I sprayed it with Shimmer Spray!
I set that piece aside and went to the giraffes next. I resized them to fit my purposes and printed them out onto Neenah Solar White cardstock. I then colored them up with Copic markers. I used RV17, 13 and 11. I went around the entire border of the giraffe with T1 and the colorless blender. Next I cut them out using a slimline die from Whimsy Stamps called Slimline Scallops.
I bet you're wondering what I'm going to do about the necktie. Just wait!
Next I colored the scalloped ovals leftover from cutting out the giraffes. I used the Picked Raspberry and a blending sponge to color them. I cut additional ovals out of scrap white cardstock and glued 3 layers together for each oval.
Now it's time to start building the card. I trimmed the striped panel 1/4" off of one short side and one long side. I didn't want to waste the long strip I cut off so I added it to the inside.
I glued the striped panel down to a white card base which is 8 3/4" x 3 3/4". I used temporary adhesive to place the pink ovals down. Then I tucked in the giraffe ovals. I picked the ovals back up and added liquid glue before putting them back in place. I printed the "Welcome Baby" sentiment from the brand new Footprints On Our Hearts set onto white cardstock. I trimmed it down and backed it with a piece of gray cardstock. Then glued it down.
I held the finished card in the sunlight to try and catch all the shimmer from the shimmer spray. It's so awesome! You can also see how I handled the ties. I colored them like one of the other spots. Then I used teeny tiny adhesive backed gems to make it look like they are wearing necklaces! Pretty clever, eh?
And of course I didn't want to have just a plain old white envelope. No sir. I got out the new Slimline Envelope Builder die from Trinity stamps and made a cute pink envelope. It makes my matchy-matchy heart so happy!
Oh, I almost forgot, Polka Dot Orchard is having a 35% off sale right NOW. No code needed! Go get yourself some new goodies. You deserve it! Thanks so much for stopping by my crafty corner of the world!
~Kristina
Supplies used:
Compensated affliate links may be used - I may receive a small commission at no additional charge to you should you make a purchase using my link.
 Neenah Solar White Shop at: SBC | EH |
 Tombow Mono Multi Liquid glue Shop at: SBC | EH |
 Tonic Studios-Retractable Craft Pick Shop at: SBC | EH |
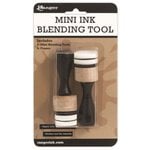 Mini Ink Blending Tool Shop at: SBC | EH |
 1/4 inch double sided tape Shop at: SBC |
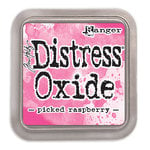 Distress Oxide - Picked Raspberry Shop at: SBC |
 Copic Marker Colorless Blender Shop at: EH |
 Sheer Shimmer Spritz, Sparkle Shop at: EH |
 Spun Sugar Distress Oxide Shop at: SBC | EH |
 Cloud 9, Nuvo Dream Drops Shop at: SBC | EH |
 Copic Marker T1 Shop at: EH |
 Copic Marker RV11 Shop at: EH |
 Copic Marker RV13 Shop at: EH |
 Copic Marker RV17 Shop at: EH |
 8.5 inch Tonic Guillotine Cutter Shop at: EH |
 Slimline Stripes stencils - Trinity Stamps Shop at: T |
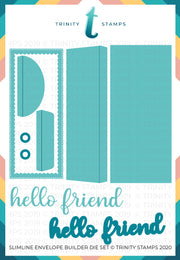 Slimline Envelope Builder die - Trinity Stamps Shop at: T |


No comments:
Post a Comment