I am using the Whoops A Daisy set from Polka Dot Orchard. You can grab it right HERE and it's on sale (for now) at 35% off! Don't miss your chance to stock up.
I wanted to start by showing the gel prints I'm using on this card. Let's just say lots of fun was had during their creation.
For these two pieces I started by printing the daisy image on some inexpensive cardstock. Then I used my gel press, stencils, objects and acrylic paints.
And let's see the finished projects.
For the green version I cut the green layer using the largest die from Trinity Stamps Slimline Scalloped dies. The daisy layer I cut using the smallest layer die from Trinity Stamps Stitched Slimline dies. I glued the green layer onto a white card base which measured 8 3/4" x 3 3/4". I put foam tape on the back of the daisy layer before adding it onto the green layer.
I printed the sentiment from the Whoops A Daisy set out onto the same white cardstock that I used for the card base. I cut the blue background piece using the Stitched Slimline dies on the top and the bottom edge. I wanted it to match the other stitching already on the card. I glued the sentiment strip onto the blue and trimmed the edges to hang over the daisy panel.
For the pink version I cut created a blue card base that also measures 8 3/4" x 3 3/4". I cut a piece of white cardstock using the largest die from Trinity Stamps Stitched Slimline dies. I glued it onto the card base. I trimmed the daisy layer down using my trimmer to be slightly smaller than the white layer. I glued it down to the white layer.
This sentiment also comes from the Whoops A Daisy stamp set. I thought it was fun but it was too big to fit the card how I wanted it to. I chopped it apart to suit my needs! I layered it onto some pink cardstock, added foam tape and stuck it to the daisy layer.
I love the completely different but similar looks. It was also fun to do it in both a vertical and horizontal orientation.
Both cards have a lot of shimmer you can't see in the photos above and I tried to capture it below. You can also see the great texture!
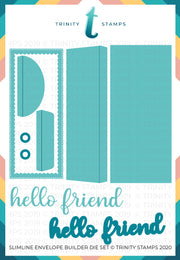
I didn't get a chance to make them yet but I plan on using the Trinity Stamps Slimline Envelope Builder dies to create some fabulous envelopes!
Now it's time to go make more messes with my gel plate and acrylic paints!
~Kristina
Supplies used:
Compensated affliate links may be used - I may receive a small commission at no additional charge to you should you make a purchase using my link.
 Neenah Solar White Shop at: SBC | EH |
 Tombow Mono Multi Liquid glue Shop at: SBC | EH |
 Therm O Web Foam Tape Shop at: SBC | EH |
 Stitched Frames & Squares - Trinity Stamps Shop at: EH | T |
 8.5 inch Tonic Guillotine Cutter Shop at: EH |
 Slimline Envelope Builder die - Trinity Stamps Shop at: T |
 Slimline Scalloped Card Panels die - Trinity Stamps Shop at: EH | T |
 Ranger Ink Gel Plate 9 x 11 Shop at: SBC |
 Speedball Brayer - 4 inch Shop at: SBC | EH |


No comments:
Post a Comment