Hiya friends! I'm over on the Stamplorations blog today as a guest digital designer. This month's trio of projects features the Sketched Cupcake & Cupcake Row digital stamp set. I always try to do a sort of theme and this month I'm calling it "Color Poppin'."
My first project is a bright and fun bookmark.
I printed the image twice in the same size. One image I colored with fluorescent Copic markers and the other I left uncolored.
I cut the word "read" out of both of them.
I cut the same letters out 4 more times from plain white cardstock. Then I stacked and glued all of the letters together. I rounded the corners of the plain panel and added it to a piece of black cardstock slightly larger. I also round the corners on the black panel. Then I glued the stacked letters in place. I added liquid glue to the bottom of the letters and sprinkled with glitter.
For the finishing touch I punched a hole through both layers and added a bright ribbon!
For my second project I got to play with my gelli plate!
I grabbed my gelli plate, several acrylic paints, Flair slimline stencil and Bloomdalascopic #7 stencil. I created a couple of different panels because you can't make just one when you play with gelli plates!
I printed the Sketched Cupcake out onto Copic friendly cardstock. I added minimal color to the wrapper with some toner greys. For the frosting I used an embossing pen to add ink and then used White Satin Pearl embossing powder. It added such a lovely shimmer!
I picked my favorite panel and added it to a gray card base. I added foam tape to the back of the cupcake and adhered it to the card. I also used a Happy Birthday sticker from the Just Everyday Greetings sticker pack. Glued on a few sequins and this beauty was finished!
My third project I think is my favorite of this group. Don't tell my other cards!
I printed the Cupcake Row out onto white cardstock. I grabbed the Art Splatter stencil, blending tools and a rainbow of Distress Ink pads. I added the stencil splatters at different heights, flipped it over, shortened the drips and so on to make each splatter look different.
Then I used the same Distress Inks to add splatters. Keeping it mostly over the same area as the stencil splatter. I added black splatters over the entire panel.
I added it to a black panel and then onto a white slimline card base. That's it!
I hope you have enjoyed my projects today! You can use code STAMPGIRLKRISTINA to get 20% off at the Stamplorations store.
Have a fabulous day!
~Kristina
Supplies used:
Compensated affliate links may be used - I may receive a small commission at no additional charge to you should you make a purchase using my link
 Teflon bone folder Shop at: EH |
 Neenah Solar White Shop at: SBC | EH |
 Tombow Mono Multi Liquid glue Shop at: SBC | EH |
 Lawn Fawn Black Licorice Cardstock Shop at: SBC |
 Mini Ink Blending Tool Shop at: SBC | EH |
 Zig 2-way glue pen Shop at: SBC | EH |
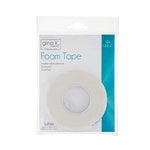 Therm O Web Foam Tape Shop at: SBC | EH |
 Small Black Brayer Shop at: EH | T |
 White Satin Pearl embossing powder Hero Arts Shop at: SBC | EH |
 Versamark Pen Shop at: EH |
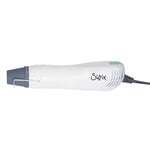 Heat Tool Shop at: SBC |
 Bold Caps dies - Altenew Shop at: Altenew | SBC |
 Mowed Lawn Distress Ink Shop at: SBC | EH |
 Candied Apple Distress Ink Shop at: SBC |
 Carved Pumpkin Distress Ink Shop at: EH |
 Squeezed Lemonade Distress Ink Shop at: EH |
 Salty Ocean Distress Ink Shop at: SBC |
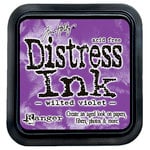 Wilted Violet Distress Ink Shop at: SBC | EH |
 Sparkling Clear mix sequins Shop at: EH |
 FY1 Copic Marker Shop at: EH |
 FYR1 Copic Marker Shop at: EH |
 FRV1 Copic Marker Shop at: EH |
 FYG2 Copic Marker Shop at: EH |
 FV2 Copic Marker Shop at: EH |
 FB2 Copic Marker Shop at: EH |
 Slimline Scalloped Card Panels die - Trinity Stamps Shop at: EH | T |
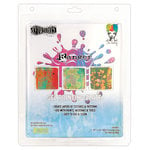 Ranger Ink Gel Plate 9 x 11 Shop at: SBC |


No comments:
Post a Comment