Saturday, July 24, 2021

Baby Boy Blanket

 Hello one and all!  Today I'm sharing something other than cards!  I keep meaning to create this post and somehow never get it done.  

One of the other crafts I enjoy doing in my downtime is using Artesprix sublimation markers to create fun gifts.  When I learned that I was going to have a my first grandchild last year, I knew I needed to make him his very own blanket.  Using sublimation markers makes it simple!

Let's start with the picture of the finished blanket and then we can talk process!


How adorable is that!

I used a sweet, light blue blanket I purchase off of Amazon.  You can find it HERE and it comes in four different colors.

Next I went to the internet looking for free coloring pages I could use for my images.  I printed them out onto plain copier paper.  Then I flipped the paper over and proceeded to trace the images with Artesprix sublimation markers.  I have misplaced my notes but I'm fairly certain the three markers I used were from the Original 10 marker set you will find HERE.

Here they are after I finished coloring and before applying heat.


Please note, there is a proper "sandwich" to build prior to applying heat.  

3. Blanket (item to be sublimated)
4. Image, color side down, held in place with heat resistant tape
5. Protective heat resistant paper

Then you apply the heat!


And the final images!


This did not take a lot of time nor did I find it very difficult to make!  I plan to make more of these blankets in the future.  I know that my technique will improve each time.

Please check out the Artesprix store HERE for their full line of sublimation products and blanks.  You can get 10% off your purchase by using the code KKRAFTOLOGY10.  You should also check out their blog HERE and their Instagram HERE.  They have an awesome design team with fabulous creations to share!  

Have an amazing day!
~Kristina


Sunday, July 18, 2021

Toad-ally Amazing

I'm so excited that you've stopped by today!  I have my very FIRST light up card to share!!  I have always wanted to try one but have been intimidated by them.  Friends.  I'm here to tell you not to wait!!  Pear Blossom Press makes it SO super easy with their EZ-Lights!  Let's take a look shall we?


My card uses brand new products from Scrappy Tails Crafts June release.  When I saw the Fairy Botanicals stamp set, I knew I had to have it!  The little toad stole my heart.

The first thing I did was to create masks for the three stamps I planned to used on my card.  Then I ink blended the panel with three Distress Inks.  The colors I used were Old Paper, Shabby Shutters and Forest Moss.  Next I removed the masks.


I used my Misti to line up the stamps with the corresponding blank areas.  The Misti made this step a breeze.  I did go in with a tiny blender tool to add Distress Ink to the few areas I didn't cut out of the masks.


Then I colored the stamped images using Zig Clean Color real brush markers.


Now for the fun part.  Adding the lights!  It couldn't be any easier.  I poked 3 small holes where I wanted the lights to be.  I lined everything up on the back and used tape to hold it in place.  Then I added a double layer of foam tape.  


I cut a bright pink cardstock panel to go behind the frog panel.  I felt it was a little plain so I used a pink Copic marker and a ruler to create some quick stripes.


I adhered both panels to a 3 1/4" x 6 1/4" mini slimline card base.  I stamped the sentiment on a banner die cut and glued it to the card.  Let's look at the lights!


This was an absolute blast to make!  Vist the Scrappy Tails Crafts store HERE and stock up on all the fabulous new products!  Don't forget to use code STCBLOG to get 10% off!

Have a happy and crafty day!
~Kristina
Supplies used
Compensated affliate links may be used - I may receive a small commission at no additional charge to you should you make a purchase using my link.
Teflon bone folder
Teflon bone folder
Shop at:
EH
Green 40 - Zig Clean Color
Shop at:
EH
Tombow Mono Multi Liquid glue
Shop at:
SBC | EH
Distress Ink pad Old Paper
Shop at:
SBC | EH
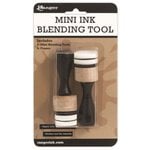
Mini Ink Blending Tool
Shop at:
SBC | EH
Therm O Web Foam Tape
Shop at:
SBC | EH
Strathmore Bristol Smooth paper
Shop at:
EH
Dark Pink 27 Zig Clean Color Real Brush Marker
Shop at:
EH
Lt. Green 41 Zig Clean Color Real Brush Marker
Shop at:
EH
May Green 47 Zig Clean Color Real Brush Marker
Shop at:
EH
Olive Green 43 Zig Clean Color Real Brush
Shop at:
EH
Ranger Tim Holtz Water Brush - Fine Brush
Shop at:
SBC | EH
Jet Black Amalgam  ink pad - Gina K
Jet Black Amalgam ink pad - Gina K
Shop at:
EH
Persian Green 33 Zig Clean Color Real Brush
Shop at:
EH
Deep Brown 68 Zig Clean Color Real Brush
Shop at:
EH
Brick Beige 75 Zig Clean Color Real Brush
Shop at:
EH
Forest Moss Distress Ink
Shop at:
SBC | EH
Copic Marker T1
Copic Marker T1
Shop at:
EH
Black 10 Zig Real brush marker
Shop at:
EH
Shabby Shutters distress ink
Shop at:
SBC | EH
Sitting Butterfly Dies - Scrappy Tails Crafts
Shop at:
SCT
Fairy Botanicals - Scrappy Tails Crafts
Shop at:
SCT
Bright Yellow 52 Zig Clean Color real Brush
Shop at:
EH
Pale Yellow 55 Zig Clean Color real brush
Shop at:
EH

Tuesday, July 13, 2021

Daisies and butterflies

Welcome back friends!  My project for today is a card I created using products from Scrappy Tails Crafts March 2021 release.  They are the Oopsy Daisy stamp set and the Sitting Butterflies dies.  Let's take a look at my card shall we?


I had more pictures of the process but I managed to delete them somehow!  So I took a few pictures of some of the pieces and then the final card.  I'll talk you through the process.

I started with this gel print I made some time ago.  When I can't really create, I love to get out my gel plate and just play.  This results in a stack of prints for me to pull out when the mood strikes!  This purple and yellow print called to me.


I cut it down to 3 1/4" x 8 1/4".  Next I went to my stack of random things in my craft room.  I had swatched out some brand new shimmer watercolors earlier in the month in a rainbow order.  I grabbed the Sitting Butterfly dies and cut out the solid butterfly die six times.


I then cut out the detail butterfly die six times out of black watercolor paper that I had swatched with the same shimmer watercolors.  I used a liquid glue to adhere the outline piece to the watercolor solid butterfly.  I intentionally kept from lining the images up exactly.  This makes it look like the solid butterfly is more of a shadow image.

I stamped two of the daisies from the Oopsy Daisy set with black ink directly onto the gel print panel.  Then I played around with the placement of the butterflies.  I felt like I had some empty space so I stamped several of the adorable bees from the same stamp set.

Next I adhered the gel print panel to a white, slimline card base.  The two butterflies on the left side of the card I let hangover the edge of the card.  I simply trimmed off the excess.  Before I added the butterfly on the right I added my sentiment which is popped up with foam tape.  I also added foam tape to the last butterfly and placed it so it looked like the butterfly was resting on the sentiment.  This one goes to the edge of the panel but not so far that I had to trim bits off of it.


For just a tiny bit more detail I took some gray Copic markers and colored the flower centers.  And that does it!  I will be back very soon with a project from the brand new June release!  Don't forget the discount code you can use for 10% off, STCBLOG.

~Kristina

Supplies used
Compensated affliate links may be used - I may receive a small commission at no additional charge to you should you make a purchase using my link.


Teflon bone folder
Teflon bone folder
Shop at:
EH
Tombow Mono Multi Liquid glue
Shop at:
SBC | EH
Tonic Studios-Retractable Craft Pick
Shop at:
SBC | EH
Therm O Web Foam Tape
Shop at:
SBC | EH
Small Black Brayer
Small Black Brayer
Shop at:
EH | T
Copic Marker T5
Copic Marker T5
Shop at:
EH
Copic Marker T1
Copic Marker T1
Shop at:
EH
Ranger Ink Gel Plate 9 x 11
Shop at:
SBC
Copic Marker T3
Copic Marker T3
Shop at:
EH
Oopsy Daisy Stamps - Scrappy Tails Crafts
Shop at:
SCT
Sitting Butterfly Dies - Scrappy Tails Crafts
Shop at:
SCT